Report an issue with this page...
Holeshot Rear Fender Eliminator Kit - Installation Tips
Yamaha FZ1
775-463-5394
1 | |
 | |
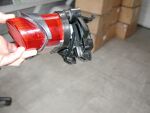
Trim off the complete plastic rear fender and stop just above the Yamaha decal. Be sure to review all photos before you start the installation. | |
2 | |
 | |
Top view of rough cut out area to make the bottom of the inner fender a flush surface. | |
3 | |
 | |
Bottom view of rough cut out area to make the bottom of the inner fender a flush surface. This includes nipping off the taillight mounting area. | |
4 | |
 | |
Top view of the cleaned up and finished sanded edges. | |
5 | |
 | |
Lower view of cleaned up and sanded bottom surface. A hand held small electric sander really works well for this step. | |
6 | |
 | |
Trim off the taillight mounting tabs so they are flush with the inner fender and do not hang below it. | |
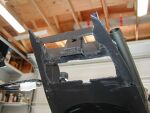
7 | |
 | |
Another view of the trimmed taillight mounting tabs. I used a belt sander for this step but other methods will work fine such as a Dremel tool. | |
8 | |
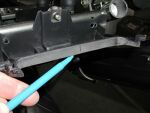 | |
The rear edge needs to be cut straight across then block or electric sanded to look like this. Hold up the Holeshot fender eliminator tray to test the fit a little at a time. Only trim enough off the plastic edge so it sits flush against the inner fender without a large gap. | |
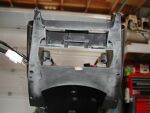
9 | |
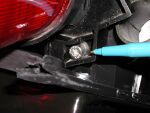 | |
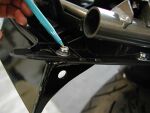
This shows the new taillight mounting point. You will drill a 13/64" hole in this cavity on the left and right side of the taillight base. Be sure the taillight is centered right to left before drilling though the front plastic panel mounting point. | |
10 | |
 | |
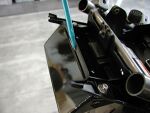
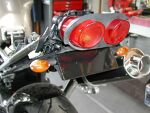
With the inner fender un-bolted from the frame and pushed down a bit its time to test fit the taillight using the provided 5 mm allen bolts. Do not totally bolt up at this time, once test fit remove the taillight and re-install the inner fender to the frame. | |
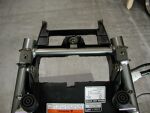
11 | |
 | |
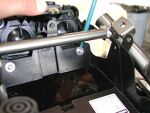
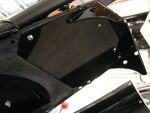
View of rear mounting points. Do not drill the mounting holes just yet! | |
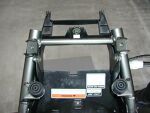
12 | |
 | |
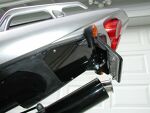
This is the location of Holeshot fender eliminator tray in relationship to the back plastic edge of the inner fender. | |
13 | |
 | |
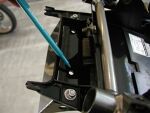
This is the bottom view of the Holeshot fender eliminator trays mounting location. Be sure The front corners just clear black plastic pop in buttons that mount the tail section in place. Once properly positioned mark your mounting holes then drill using a 1/4" bit. Mount up as shown using provided hardware per the instruction sheet. | |
14 | |
 | |
Mount your rear blinkers then route the wires through the two pre-drilled holes shown here. | |
15 | |
 | |
Mounted Holeshot rear fender eliminator tray, taillight and rear blinkers. | |
16 | |
 | |
Another view of it all bolted up and the blinker wire routing. You have yet to mount the license plate, no your not going crazy...lol. | |
17 | |
 | |
Inside view of the finished the product. The tool kit is now mounted under the front rubber strap. | |
18 | |
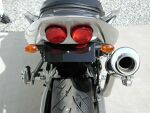 | |
Bike totally re-assembled without license plate mounted yet.... Clean indeed. | |
19 | |
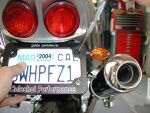 | |
Hold your license plate with frame in the desired position. Mark your holes as shown, lightly center punch and drill using a 1/4" bit. De-burr then install your license plate. | |
20 | |
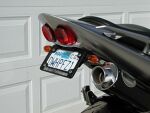 | |
The finished product is super clean! | |